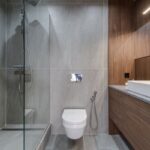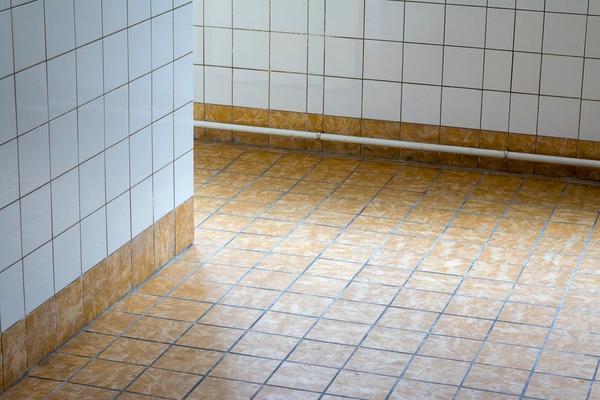
The same rectangular tile can make a bathroom feel calm, traditional or lively. The difference often comes down to how it is arranged. Bathroom tile layout patterns influence where your eye travels, how grout lines read and how neatly tiles finish around a shower screen, basin or niche.
Rather than choosing a pattern from a sample board alone, consider the surface you are covering. A layout that looks wonderful across an uninterrupted wall might create awkward slivers around fittings. Here is how the main patterns behave in real bathrooms, and where each earns its place.
Start with the shape of the bathroom
Notice the room’s longest sightline, its strongest feature and where tiles will be cut. A narrow shower wall needs a different setting-out plan than a broad wall behind a freestanding bath. Tile dimensions matter too: slim subway tiles offer more layout choices than oversized porcelain slabs.
Grout colour changes the effect. Matching grout softens the pattern, while contrasting grout makes every joint a visible line. Arrange several tiles with spacers and view them from the doorway before committing.
Stack bond: a quiet, architectural grid
With stack bond tiles, each piece sits directly above or beside the next, forming continuous grout lines. It looks orderly and modern, particularly with simple white, stone-look or muted coloured tiles. Horizontal stack bond can emphasise a long vanity wall; larger square tiles produce a restrained finish.
The precision is part of its appeal and challenge. Straight joints reveal walls that are out of plumb and tiles that vary in size. A flat, prepared surface and careful reference lines are essential. Stack bond works best where you want texture or colour to lead rather than a busy pattern.
Brick bond: familiar, flexible and timeless
Brick bond tiles use staggered joints, recalling traditional brickwork. Small subway tiles in a half-offset arrangement suit both period bathrooms and relaxed contemporary schemes. The repeated horizontal rhythm looks attractive behind a basin and across full-height shower walls.
Do not automatically use a 50% offset with long rectangular tiles. Some large-format products bow slightly, making a tile’s raised centre meet the lower end of its neighbour and creating noticeable lippage. For many longer tiles, manufacturers recommend an offset of no more than roughly one-third; follow the product’s layout and grout-joint guidance.
A one-third running bond offers a gentler stagger that can suit 12-by-24-inch floor tiles. It is useful when you like brickwork’s movement but want to avoid a pronounced halfway joint.
Herringbone: movement in a contained area
Herringbone bathroom tiles meet at right angles to create a repeating zigzag. Because the lines change direction, the pattern draws attention even when the tiles are plain. It is striking inside a shower recess, behind a vanity or on a feature wall.
Scale controls the result. Narrow, short tiles form a detailed pattern with many grout joints; longer pieces create a more open graphic. Herringbone requires thoughtful setting out and often more angled cuts than a grid, especially at edges and around niches. For balance, let one area carry the herringbone and use a simpler layout nearby.
On shower floors, choose a tile specifically approved for wet floor conditions. A decorative wall tile is not automatically suitable underfoot.
Vertical layouts: emphasising height
A vertical tile layout rotates rectangular tiles so their longer edges run upwards. In a straight stack, the grout lines create a strong vertical rhythm. This can visually emphasise ceiling height in a compact bathroom or make a narrow shower enclosure feel more deliberate.
Vertical brick bond produces a softer, staggered version. Both approaches work with slim tiles, but alignment matters at the ceiling and around wall-mounted fittings. With an uneven ceiling, plan the top cuts before beginning; a strong vertical grid can make a taper obvious.
When another pattern makes sense
Diagonal layouts turn square tiles through 45 degrees, introducing movement across a floor without changing tile shape. They can look elegant, although perimeter cuts require care. Basketweave mosaics bring small-scale detail to traditional bathrooms, while square-grid mosaics offer a quieter alternative.
Detailed patterns can be lovely on a limited floor area but tiring across every wall. Balance patterned surfaces with larger, quieter fields of tile.
Choose the pattern by surface, not just style
Shower walls and niches
Stack bond and brick bond are dependable across large shower walls; herringbone suits a feature panel or niche back. Include niche edges and shower screens in the setting-out drawing. A beautiful pattern loses impact when the most visible edge ends in tiny cuts.
Bathroom floors
Floor layouts must work with the tile’s slip-resistance suitability, the substrate and any necessary drainage slope. Smaller mosaics may follow complex shower-floor slopes more readily than large rigid tiles. For broader floors, straight grids or a manufacturer-approved stagger coordinate well with doorways.
Behind the vanity
This is an ideal location to experiment. A vertical stack can frame a tall mirror; herringbone adds detail behind a simple basin. If the tap or mirror sits centrally, align the pattern around that feature rather than starting with a full tile in the corner.
Set out the tiles before ordering extra cuts
Imagine a shower back wall measuring 1,200 mm wide, with tiles 300 mm long. Four tile lengths may seem to fit, but grout joints, actual tile dimensions and corner movement gaps change the calculation. A dry layout may show that equal cuts on both sides look better than a thin strip at one end.
Mark a centreline, calculate joints and examine where rows finish at the bath rim, niche and ceiling. Check manufacturer joint-width guidance, especially for large-format and offset installations. Allow for waste from cuts and breakages; elaborate patterns generally require more planning than straight ones.
Tile and grout do not make a shower waterproof by themselves. The correct waterproofing system belongs beneath the finish. Related guides to bathroom grout colours, choosing bathroom floor tiles and shower waterproofing can help complete your choices.
Frequently asked questions
Which bathroom tile pattern is easiest to install?
A straight stack or standard brick bond using consistent, smaller tiles is often easier to plan than herringbone. Even straightforward patterns require flat substrates, accurate layout lines and appropriate spacing.
Do vertical tiles make a bathroom look bigger?
They can draw attention upward and make a wall appear taller, but colour, lighting and uninterrupted surfaces also influence how spacious a room feels. Vertical tiles are a visual tool, not a guarantee.
Is herringbone suitable for a small bathroom?
Yes. It works particularly well as a controlled feature, such as a vanity splashback or shower panel. Choose the tile scale so the design remains legible without overwhelming the space.
Can large rectangular tiles be laid in a 50% brick pattern?
Not always. Many large rectangular tiles have manufacturer limits on offset because of potential lippage. Check the product instructions; a one-third offset or straight stack may be more appropriate.
Make the layout earn its place
The most successful bathroom tiling is not necessarily the most elaborate. Choose a pattern that strengthens the room’s proportions, suits its wet or dry surface and leaves clean, intentional cuts at visible edges. A carefully planned brick bond can look as considered as a dramatic herringbone wall.